Ever wonder why some pictures of events are great, and others are dark and blurry? It is not always about the camera; it is about the photographer. Rather, it depends on the lighting. If the lighting is good, your photograph is a great memory.
The key to good photography is good light. They can have a great setting, props, and fun, but if they do not have the lighting, it is all going to be ruined. Lighting is essential for any photo booth operator to be successful. You must use photo booth lighting since this will directly influence your picture quality, skin tones, and the mood in your photographs. If done correctly, guests beam. If you are wrong, you will find yourself with dark shadows and washed faces. There are many ways all operators can get the shot wrong despite having a perfect shot in hand.
What is the importance of lighting when taking pictures in a photo booth? It determines the way the camera looks at subjects. The proper lighting in a photo booth can improve images, skin tones, and overall quality. This blog will reveal the best tricks for solving these problems. You will learn how to take beautiful, professional photos at every event.
10 Photo Booth Lighting Secrets for Pro Shots
The key to making an average photo into a masterpiece is great lighting. You might have the highest-priced camera in the world, but if you don’t get the lighting right, it is not going to turn out quite right. By understanding your lighting setup, you can ensure your photos are clear, flattering, and vibrant, which will make them a favorite among guests to share.
1. Match the Venue Environment
A lighting design is needed for each room. A dark nightclub will need a different kind of lighting than a bright outdoor patio, and so on. Always be on time to determine the natural light and ambient light level. Select the light level of the equipment according to the venue. This stops pictures from appearing too dark or totally oversaturated.
2. Use a Softbox Diffuser
Bare light bulbs create harsh lines and highlight skin blemishes. You must use a diffuser to soften the output. A softbox spreads light evenly across a wide area. This simple tool flatters all skin types and creates a smooth, professional look.
3. Position Lights at Eye Level
Placing your lights too low casts scary shadows pointing upward. Placing them too high creates dark circles under the eyes. Set your primary light source right at the eye level of an average adult. This front-facing angle provides balanced exposure and highlights facial features perfectly.
4. Embrace Ring Lights for Portraits
Ring lights remain a favorite tool for photo booth operators. The circular design wraps light completely around the lens. This eliminates deep shadows and creates a beautiful catchlight in the subjects’ eyes. Use a ring light for small booths and tight portrait shots.
5. Adjust Your Color Temperature
Mixing warm venue lights with cool flash units makes guests look unnatural. Most daylight-balanced flashes sit around 5600K. If the venue uses warm yellow bulbs, add a color gel to your flash. Matching your color temperature ensures accurate and healthy skin tones.
6. Bounce Light Off the Ceiling
Direct flash can sometimes overwhelm your subjects. If the venue has low, white ceilings, point your flash upward. The light bounces off the ceiling and falls softly over the entire group. This technique creates a massive, natural-looking light source that easily covers large crowds.
7. Eliminate Harsh Shadows
Shadows ruin great backdrops. If your subjects stand too close to the background, your main light will cast a heavy shadow behind them. Ask guests to take one step forward. Creating distance between the people and the backdrop allows shadows to fall out of the camera frame.
8. Add a Backlight for Depth
Typically, photos with front lighting appear flat. Put a tiny, unobtrusive LED light behind the guests and aim it at the camera. This backlight will illuminate the rim around their hair and shoulders. It brings a lot of depth and foregrounds/backgrounds your subjects.
9. Test Your Camera Settings
Your camera and your lights must work as a team. Do not rely on automatic mode. Set your camera to manual. Adjust the ISO, aperture, and shutter speed to match your exact light output. Take test shots before the event starts to lock in a crisp, sharp exposure.
10. Maintain Consistent Brightness
Battery-powered lights slowly dim as the battery drains. This causes your photos to get darker as the night goes on. Keep your equipment plugged into a wall outlet. If you must use batteries, swap them out halfway through the event to keep your brightness levels consistent.
Apply these secrets to your next event and watch your image quality soar. Want to upgrade your photo booth setup? Start testing these lighting techniques today to give your clients the high-end experience they deserve.
How Does Professional Photo Booth Lighting Improve the Customer Experience?
Lighting does more than just take pretty pictures. It drives your business forward.
Better photo quality directly leads to better guest engagement. When guests see how great they look on the screen, they want to take more photos. They bring their friends over to join the fun.
This also leads to more shareable photos on social media. People only post pictures they feel good about. When you provide flattering lighting, guests will share your photos online, giving your business free marketing.
Finally, professional lighting creates a stronger brand impression at events. Clients hire you because they want a premium experience. Delivering crisp, well-lit photos proves you are a true professional.
How to Position Photo Booth Lighting for Best Results?
Buying good lights is only half the battle. You must also put them in the right place.
Front Lighting for Balanced Exposure
Front lighting is the most common setup. You place the light directly in front of the guests, near the camera. This creates a highly balanced exposure. It evenly lights faces and ensures the camera captures all the details clearly.
Side Lighting for Depth and Dimension
Side lighting is when the light angle is at 45 degrees. This casts soft shadows on one side of the face. It adds dimension and depth. It prevents the picture from being flat and gives a more three-dimensional appearance to the subjects.
Back Lighting for Separation and Drama
Backlighting places a light source behind the guests, pointing toward the camera. This puts a glowing rim of light around their hair and shoulders. It provides separation and drama. It stops people wearing dark clothes from blending into a dark background.
Multi-Light Setup for Professional Quality
The best approach uses multiple lights at once. A multi-light setup combines front, side, and back lighting. You can use a softbox in the front and an RGB light in the back. This provides true professional quality and gives you total creative control.
Common Photo Booth Lighting Mistakes to Avoid
Even professionals slip up sometimes. Watch out for these common errors.
Overexposed Faces
Overexposed faces happen when your lights are too bright or too close. The camera records faces as pure white spots. You lose all the details in the skin. Always check your brightness and pull the lights back if faces look too bright.
Harsh Shadows and Uneven Lighting
Harsh shadows occur when you use a small, bare bulb. Uneven lighting happens when you only light one side of the booth. This makes guests look tired or angry. Use diffusers to soften the light and keep it even across the frame.
Poor Background Lighting
Many operators forget to light the background. They focus only on the guests. A dark background looks muddy and unprofessional. Make sure your lights spread far enough to show off your beautiful backdrop.
Wrong Color Temperature Settings
Lights have different color temperatures. Some look orange, while others look blue. Mixing a blue photo booth light with an orange venue light looks terrible. Always adjust your lights to match the room for a natural look.
Tips to Improve Photo Booth Lighting
Small changes can drastically improve your results. Try these easy tips.
Adjust Brightness Based on Venue Lighting
Every room is different. A dark nightclub needs a different setup than a bright outdoor patio. Always arrive early and adjust your brightness based on the venue lighting. Do not use the same settings for every event.
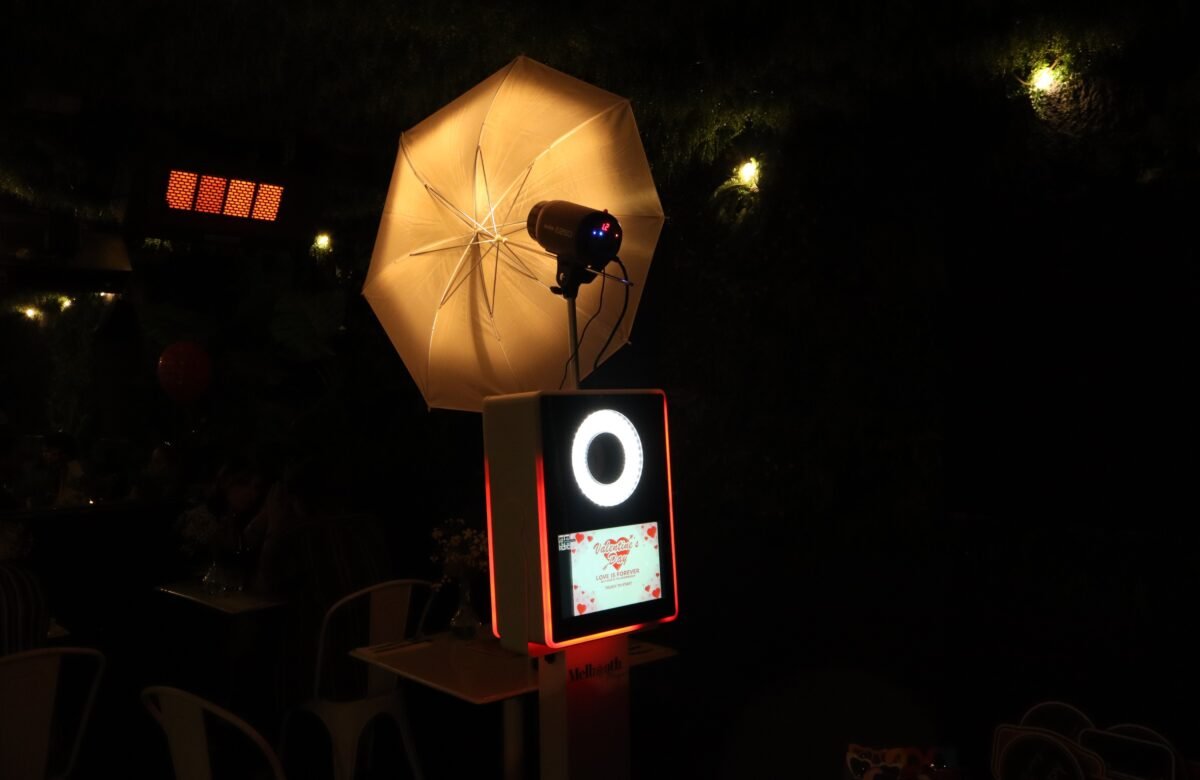
Use Diffusers for Softer Skin Tones
Bare bulbs highlight wrinkles and blemishes. Always use diffusers for softer skin tones. A simple white umbrella or a plastic diffusion panel scatters the light. It makes everyone look their absolute best.
Test Lighting Before the Event Starts
Do not wait for the first guest to arrive. Test your lighting before the event starts. Stand in front of the camera and take a few test shots. Make adjustments until the picture looks perfect.
Match Lighting with Camera Settings
Your lights and your camera must work together as a team. Match your lighting with your camera settings. Adjust your camera’s ISO, aperture, and shutter speed based on how bright your lights are.
Best Photo Booth Lighting for Different Events
You should change your lighting style based on the type of party.
Weddings and Private Events
Weddings require a soft, romantic, and elegant look. Use softboxes or ring lights. Keep the color temperature slightly warm to match the cozy vibe of a wedding reception.
Corporate Events and Brand Activations
Corporate events demand a crisp, modern, and clean look. LED panel lights work perfectly here. The light needs to be bright and color-accurate to make company logos look correct.
Birthday Parties and Social Gatherings
Birthdays are highly energetic and fun. This is the perfect time to use RGB and creative lighting. Wash the background in fun colors to match the theme of the party.
Indoor vs Outdoor Photo Booth Setups
Indoor events give you complete control. Outdoor events force you to fight the sun. For outdoor setups, you need very powerful lights to fill in the shadows caused by direct sunlight. Always bring sandbags to keep your light stands from blowing over in the wind.
Discover Photo Booth Lighting Secrets with Melbooth Magic
When it comes to creating unforgettable event photos, Photo Booth Lighting plays a major role in achieving professional results. At Melbooth Magic, we understand that great lighting is what transforms a simple photo into a lasting memory. Our team carefully designs every lighting setup to create flattering skin tones, balanced exposure, and sharp image quality in every shot. From weddings and corporate events to private celebrations, we use professional lighting techniques and high-quality equipment to make every guest look their best. With Melbooth Magic, your event gets more than a photo booth. It gets a premium photography experience powered by expert Photo Booth Lighting.
Conclusion
Photo booth lighting remains the single most important part of your setup. Let us recap why photo booth lighting is essential. It controls the mood, flatters your guests, and makes your camera perform better.
You do not need to spend thousands of dollars to get it right. Small lighting adjustments can create amazing, professional results. Moving a light a few inches or adding a diffuser changes everything.
Investing in the right lighting setup improves every single photo booth hire experience. Your photos will look better, your clients will stay happy, and your business will grow. Take the time to master your lighting and watch your photo quality soar.